Showing posts with label nailpolish. Show all posts

Nfu-Oh 40

this pretty came in the mail yesterday.  it took a while to arrive, thank you Canada Post strike.  the folks at FabulouStreet were really wonderful about working around the strike.  i highly recommend them if you're looking to buy yourself some Nfu-Ohs :)

i unwrapped my new Nfu-Oh while eating dinner out at a restaurant and could.barely.stop.myself from applying a coat right then and there.

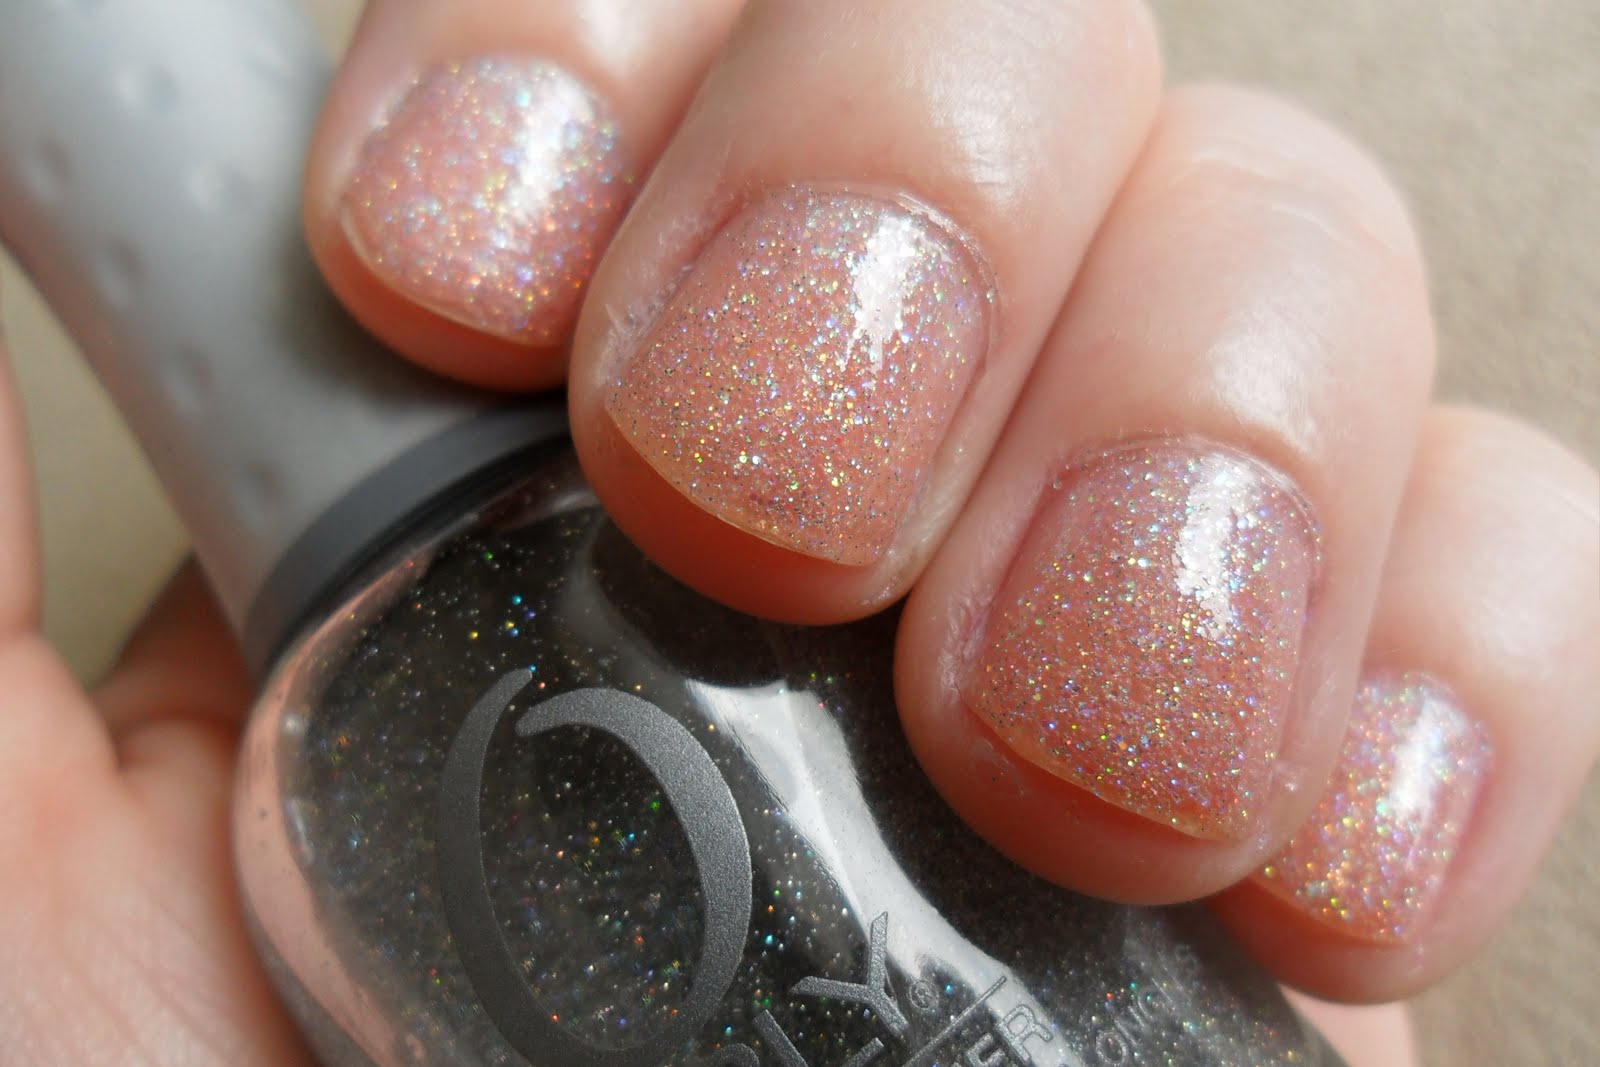
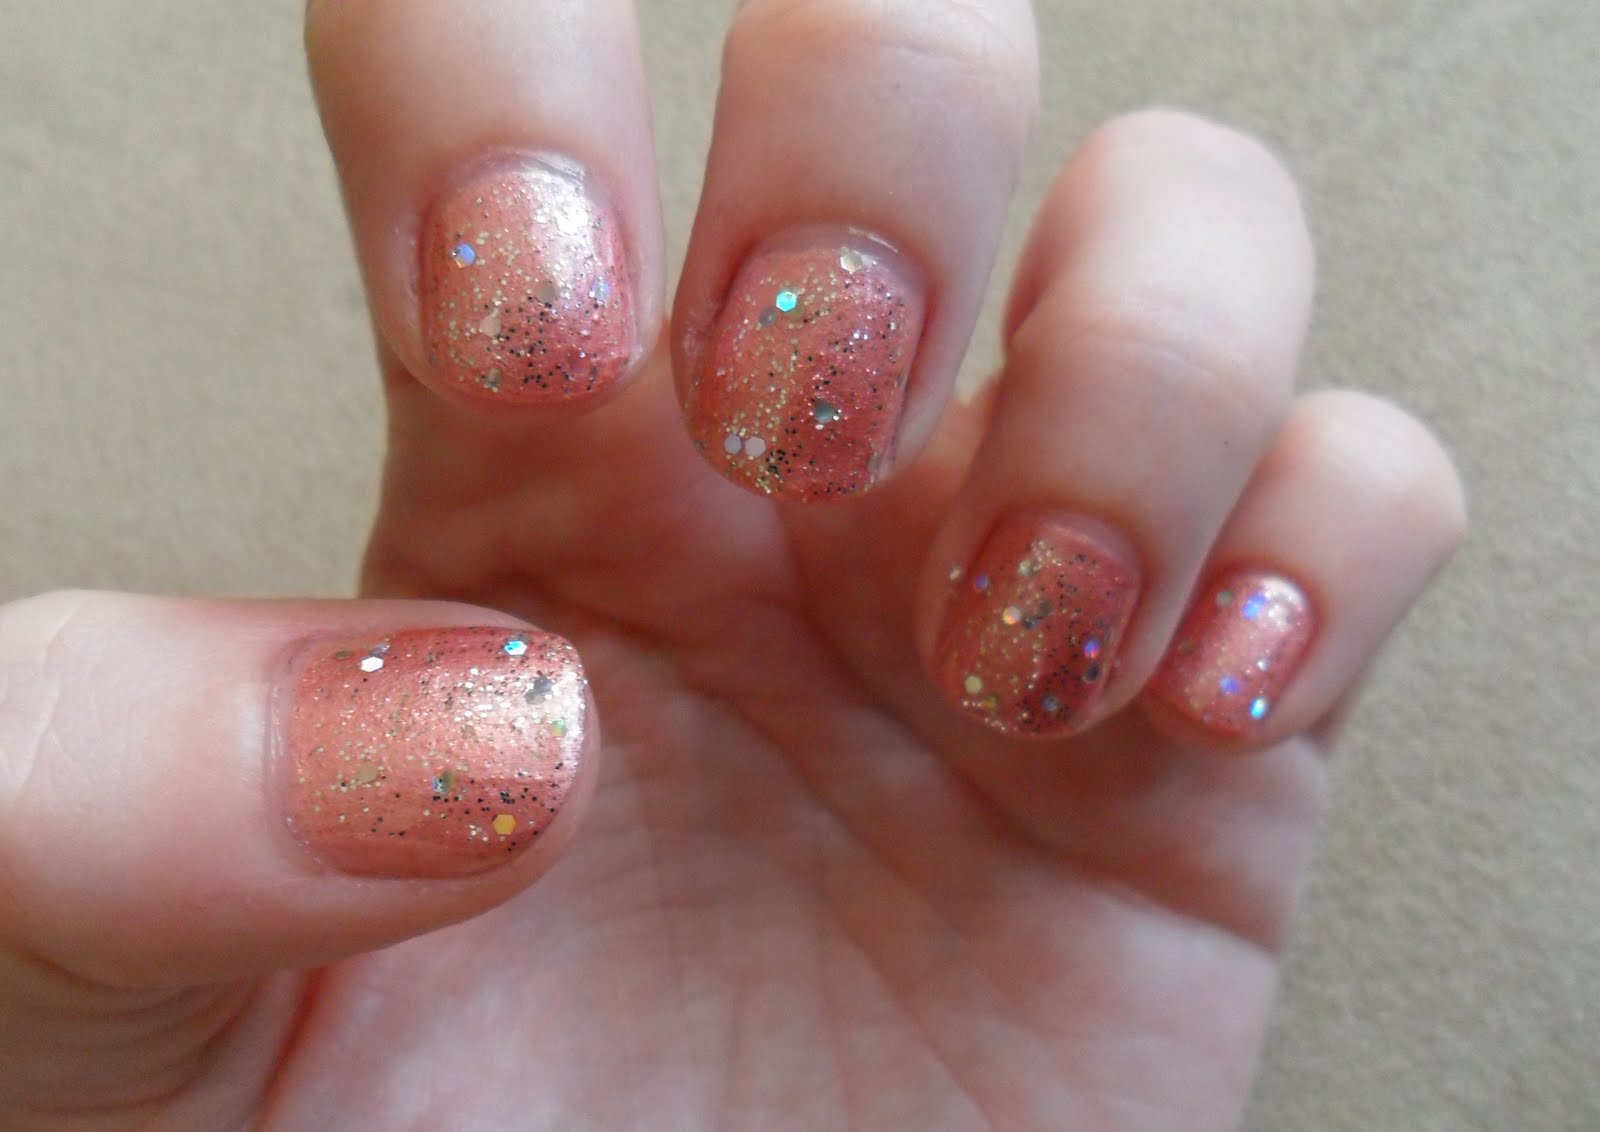
as soon as i got home it went on over my skittles mani.  it has a wonderfully different effect on the different colours.  my favourite, although i could not capture it with the camera, is the funky way it creates a shimmery lilac/blue over the yellow polish. 

i'm excited to try it over black :)

pardon the second rate pictures and dry cuticles.  i was way too excited about taking the pictures and moisturizing my cuticles was a thought that got pushed to the back of my mind in a fairly quick manner because i just.had.to.take.pictures.naow.  i take my photos near my living room window to take advantage of the natural light, but by the time we got home from errands and dinner the sunlight had waned and wasn't great for capturing the wonderful magic of Nfu-Oh 40.  so expect better pictures in the future :)


the polishes under the Nfu-Oh are Sally Hansen Insta-Dri in Grape Going!, Sally Hansen Hard As Nails in Fashionista Orange, Hot Yellow and Be Seen Blue.  last but not least is China Glaze Reggae to Riches (fuchsia).

skittles!

before i show you my skittles mani, i have to share what i did to the french manicure before removing it.  i found a bottle of Sally Hansen Hard As Nails Ice Queen the other day while at Rexall (a pharmacy here in Canada).  the pink and blue hex glitter called out to me and for $2ish i couldn't resist taking her home.

so i did a "swatch" (of sorts) over the french manicure.


and now onto my skittley fingers :)

the polishes i used are Sally Hansen Insta-Dri in Grape Going!, Sally Hansen Hard As Nails in Fashionista Orange, Hot Yellow and Be Seen Blue.  last but not least is China Glaze Reggae to Riches.
left hand:
 right hand (now that i'm seeing the pictures i have realized i flooded the cuticle on my middle finger.  doh!!):
mmmiiiiiinnnneeee: 

Simple French Manicure

i'm not even sure why i'm posting it.  it looks pretty much like every other white tip manicure, well, except maybe a little less tidy than most of them ;)

Joe Fresh un-named white on the tips.  and a few coats of Orly's Fifty Four top coat over the whole nail.  :)

this polish was hard to capture on camera.  i have no direct sunlight coming into the apartment at the moment.  it is so sparkly in bright lights and the sun!

i took quite a few pictures of this manicure but only a few ended up usable.

the polishes i used are Nicole by OPI's Me + Blue from the Justin Bieber collection.  the purple is China Glaze C-C-Courage.  and i used one coat of Orly's Prisma Gloss Silver on the fingers with the purple polish to make it match the holo of the Me + Blue.

a blurry shot to capture the holo glitter:

natural light:

flash:


under the stove light.  pardon the background!  the lighting under the range hood caught the holo glitter nicely:

Glitter babies

having super short nails is really not fun.  the ones that i broke at Ikea are still stinging like mad everytime i wash my hands or do dishes.  or paint them. 

since there isn't much to paint i decided to go with a nude look. 

heh.  who am i kidding.  i don't do nude well.  so i did a nude glitter! 

i used 2 or 3 coats of Funky Fingers Sakura Glow because it has a pink base and i thought it would help disguise the staining on my nails.  and then i used 2 or 3 coats of Orly Prisma Gloss Silver.

and a super duper way-to-close macro shot where you can see that my fingers took a beating from the "clean all the things" day:

yesterday during a long ride in the car to visit family my man suggested a manicure idea.  last night i decided a variation of what he described was a great idea.  so i pulled out my polishes and spent about an hour (yeah, laugh away) deciding which colours would work for the idea.

i came out with Color Club's Total Mystery (the blue), Alias (the purply-ish one), and Ulterior Motive (the pink).  all from their Alter Ego Keep It Under Cover collection.

i painted my thumbs with Total Mystery, my index fingers are half Total Mystery, half Alias.  the middle finger is all Alias.  the ring finger is half Alias, half Ulterior Motive and the pinky is all Ulterior Motive. 

with the flash to show the glitter a bit.  you can also see the shrinkage caused by my brand new Seche Vite :(

and now i must get dressed and ready to go.  we're heading out to Ikea to buy a couple of shelves for the living room so i will have more strorage for my yarn and polish :)  i love Ikea :)

Holo Heaven!

the girly manicure did not last.  i just couldn't take it anymore.  all the elements together were just too sweet.  so i spent a while soaking off the decals last night and removing all evidence that my nails were cutesy girly.

i replaced the girly with more pink.  but it's way less cutesy than yesterday's look. :)  i used OPI's Designer Series DS Signature and OPI's Teenage Dream from the Katy Perry Collection on my ring finger and the tip of my pinky finger.

i have to take a moment to tell you how i ended up with Signature.  i was perusing the makup section at my local Winner's (a brand name discount store here in Canada) and i saw that they had nailpolishes.  i wasn't huge into polish at the time.  i don't really even know why i looked.  but i did.  and i saw the Signature and i was wowed by it.  i didn't know it was called a "holo" or that it was discontinued or even rather iffy to get one's hands on.  i just saw *pretty* and Had To Have It.  i paid $6.99 for it.  the most expensive polish i had ever bought (at the time).  when i started to read nailpolish blogs and really get into polish i realized i had scored a pretty decent deal on the Signature!  now i kinda wish i had bought all three bottles they had!

so... in essence, OPI DS Signature started my nailpolish obsession :)

for the pinky i wiped off a lot of the polish from the brush and started applying it 3/4 down my nail.  i got a light coat of the glitter this way.  when it was dry i applied another light coat from about 1/2 way down my nail.  and then when that was dry i did another coat at just the tip of my nail.  i think the effect turned out similar to a sponged look :)

i applied my Seche Vite top coat and voila!  all done.  i applied a rather generous coat to the glitter nails but i just like my tips to feel smooth rather than gritty, as glitter tends to feel.


with flash, because it is so overcast here today that getting the camera to pick up the holo effect without the use of the flash was proving rather difficult:
just a little bit.  i had to stop at walmart for milk and decided it was a good time to stalk the makeup section.  oh, who am i kidding, there is never a bad time to check out the makeup section ;)  i got a few "art" nailpolishes.  i have never used them before, i'm afraid i may not have a steady enough hand to create much with the super thin long brushes they have.  after opening them and checking out the brushes i have been thinking about getting some nail wheels to practice designs on.  zomg... this obsession just keeps getting bigger and bigger and bigger!!

i also got some cosmetic sponges to try out some sponged looks with my nails.  and some nail art stickers.  when i get home i realized that i had two of the same designs.  one packaged was taped tightly to the next and they looked like one alone.  so when i got home i was surprised to find two.  :\

not pictured is a bottle of pure acetone to help with small clean ups, although my application is getting better :)

Orly Prisma Gloss Silver

yesterday i mentioned how i nearly passed up Orly Prisma Gloss Silver in the store because the pigment had settled and i thought it was just another boring clear polish.  i had assumed it was sitting out on the display untouched for a month or two or more.

but i was wrong.  this stuff settles at warp speed.

here it is in it's shaken up glory:


this was about an hour after shaking it all up to mix it:

i had planned on taking pictures every hour to show you guys the settling, but i got rather busy with other things, so this one was taken about 3 or 4 hours after its last shake:

and this one was taken this morning when i got up, maybe 12ish hours after the last time i shook it up.  this is pretty much how it looked when i picked it up at the beauty supply store:

my nails are still, pitifully, naked.  i will have time this afternoon to get them all prettied up.  maybe with my one of my new haul polishes.  i have been feeling very inspired by pretty much everything Let Them Have Polish posts!  love love love her fantabulous creativity :)
yep.  i went to the beauty supply store right after the bank.  sssshhh.  i like that store.  they don't carry a huge selection, but they carry enough to drool over.  and when you buy polishes they wrap them up in protective wrapping.  i declined the wrapping, i knew it would be a waste cuz i live right around the corner and the polishes were not going to stay wrapped up for long ;) 

from left to right:  i got a new Seche Vite (mine is half full and starting to do the evil shrinkage thing), China Glaze Reggae to Riches, China Glaze Sugar Plums, China Glaze Anklets of Amethysts and Orly's Prisma Gloss Silver.  i almost passed up the Orly because it had settled so badly it looked like just a clear polish.  i'm glad my curiousity got the best of me and i picked it up to see the oh so pretty holo pigment settled at the bottom.  i shook it up and then had.to.have.it. 


naked!!

i'm leaving the house today with my nails naked (except for a nail strengthener i applied last night). i wish i had the time to paint them before i go out.  they are stained a perty orange from wearing China Glaze's Drastic without a base coat (doh!).  but... when it comes down to it, i'd rather go out with my nails naked than not cash the cheque that's in my hot little hands.  and, conveniently, my bank is located almost across the street from a beauty supply store... hrmmm ;)

something simple tonight.  my toxic skulls were lasting perfectly fine, not even a chip!  but i get bored easily i guess, cuz i just needed a new look.  my man was off helping out a friend, so i took the opportunity to paint my nails.  he really hates the smell of nailpolish.  i really hate the smell of onions (always gives me a migraine).  so, since he never cooks with onions for me, i do the same for him with the polish and only do my nails when he's at work or very very asleep.  lol.

this one is China Glaze's Good Witch?  and Nicole by OPI's Sprinkle of Twinkle (which i scored for 50% off today at Shopper's Drug Mart).


pardon the flashy pictures.  it is literally the middle of the night here (2:23a.m. as i start this post).  i can't sleep so i decided to do a quick tutorial on how i made the skulls and bows in my last manicure :)

so... first, gather up your supplies.  you'll need the polishes you've chosen to use and something to create small dots with.  i use a fine knitting needle, because i knit, a lot, and they're handy around here :)


using the brush that is in your nailpolish bottle, and using the colour you want for your skull, create a circle on your nail for the head of the skull:


next, get a spare piece of paper or foil and put a drop of the skull colour on it:

using your dotting tool, create three "teeth" on your skull:

next, get your bow colour ready by placing a drop on your scrap piece of paper.  to make the bow, create 5 dots with your dotting tool in this configuration:

next step is to fill in between the dots to create the bow:

now add a drop of your back ground colour to your spare piece of paper and use your dotting tool to add eyes and a nose:

seal that baby up with some topcoat and you're done :D

happy painting :D